Want to know more?
Don't miss any product updates on our industrial borescopes

Industrial borescope
solution service provider
Company Address
Office : 18F, Pingshanshouzuo, Pingshan District, Shenzhen,Guangdong
Contact Info
Ph: +86-0755-89588241
The main production is automotive turbochargers. Automotive turbochargers are one of the important components inside the engine, mainly driving coaxial impellers to improve the combustion efficiency of the engine through high-speed rotation. Once the turbine has defects, cracks or pinholes, it can cause oil leakage and increase fuel consumption, The bearing impeller will lose balance.

Therefore, we understand the customer's demands:
Industrial endoscopes require high clarity, with a requirement of no less than one million pixels,
There is a need for custom naming and labeling functions, as it requires taking a large number of photos and videos, taking different locations, and automatically recording, editing, and archiving. If any missing or defective parts are found, there is a need for labeling function for easy traceability.
2、 Actual testing conditions:
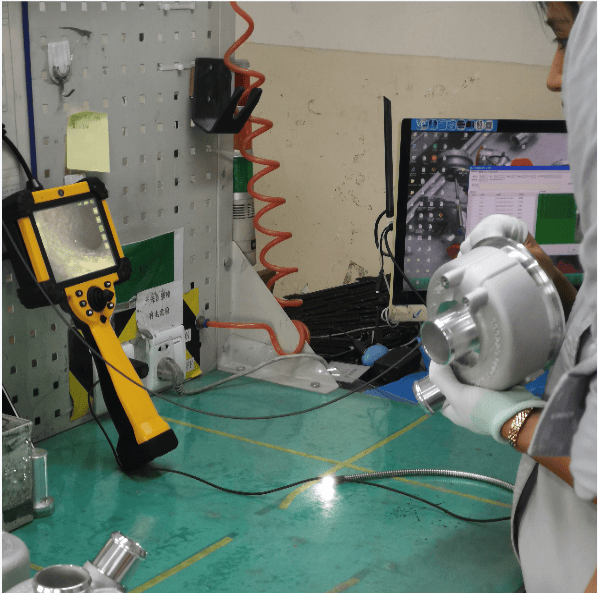
The customer mainly inspects automotive engine turbine components, with a flow channel diameter of around 3mm to 5mm and two internal curved channels. Observation requires turning one circle to clearly see the inner wall of the flow channel, and the inlet diameter of the inner wall of the flow channel is about 6mm.
3、 Difficulties in detection:
The flow channel needs to be rotated 360 ° to see the entire circle clearly, and the frequency is relatively high, which will cause significant wear on the front end of the equipment lens, thereby increasing costs and the service life of the equipment.

Solution and Selection:
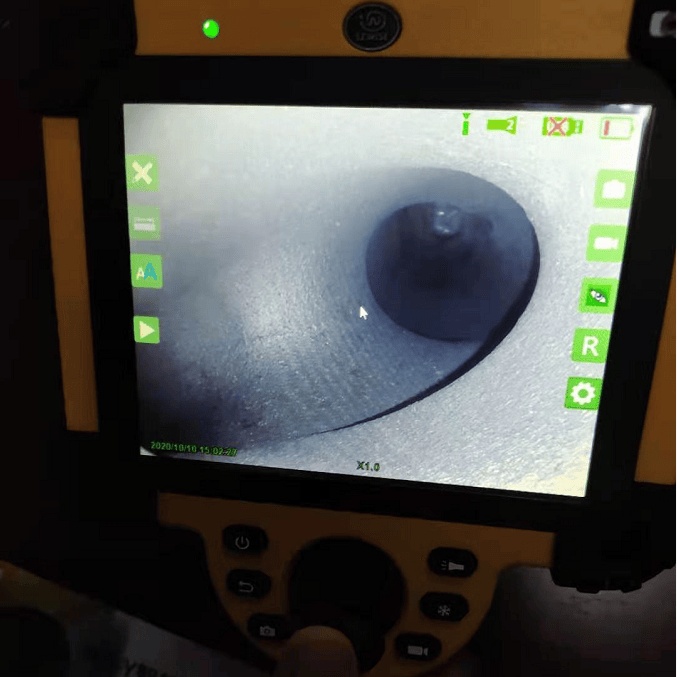
1、 Through the industrial endoscope Y series equipment of Shenzhen Micro Vision Optoelectronics Technology Co., Ltd., with 1 million high-definition pixels, it can meet the detection of 360 ° inside the communication channel, visually and clearly determine whether the observation inside is qualified, and take photos, videos, archive images, and videos clearly. Built in 64G solid-state drive to prevent data loss, with 2 USB ports and VGA video output point-to-point.
2、 Recommend the use of a 2.8mm diameter endoscope to detect defects inside the flow channel. The endoscope can be inserted into the cavity to achieve 360 degree real-time guidance, with built-in lighting source, and the inspector can observe the internal image through a LCD display. Without disassembling and damaging the interior of the cavity, the condition inside the cavity can be observed through an industrial endoscope, and problematic defect areas can be photographed or recorded.
3、 Due to the friction caused by the back and forth inspection of the inner wall, our company has adopted a thickened alloy lens sleeve. In order to reduce lens wear and increase service life, customers have high requirements for their own product quality. To ensure strict quality control of product technology and market supply demand, we can clearly see the interior through our endoscope equipment. Customers are satisfied with our products, It can also solve related problems for customers.


Industrial borescope
solution service provider